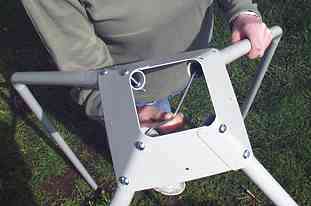
Using the 1 1/2 inch long bolts and the self-locking nuts, fasten 3 of the 4 legs to the inside of the metal top with the bolt heads on the outside of the top (Fig. left).
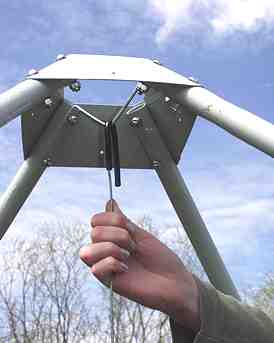
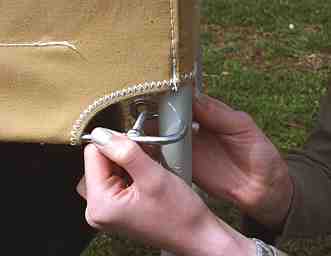
Before you fasten in the 4th leg, place one end of the "W" hanger into the end of the leg opposite the 4th leg and then place the other end of the "W" hanger into the end of the 4th leg as it is fastened into place (Fig. right).
NOTE: the "W" hanger can not be put in place after all four legs are secured.
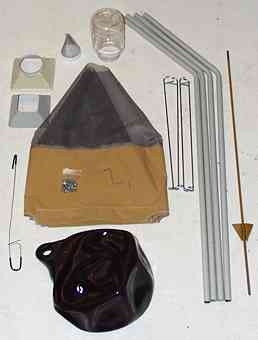
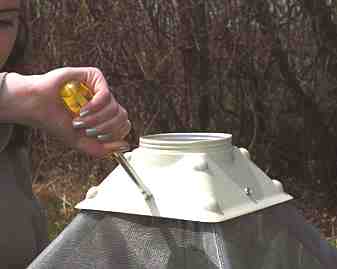
TARGET BALL CAUTION: Before inflating, warm the ball to at least 70 F (21 C). Colder may cause damage. The valve is screwed firmly into the ball. Using a Philips screwdriver check to be sure that the valve is screwed tightly into the ball. Using a twisting motion push the inflation needle into the valve. The needle bottoms out in the valve, it does not go all the way through the valve. The ball needs just enough air to be firm but it does require significant air pressure to overcome the seal of the valve at approximately 40/50 psi. Do not over-inflate. (A gas station or tire store can make inflating the ball easy.) Once inflated it should stay inflated for years.
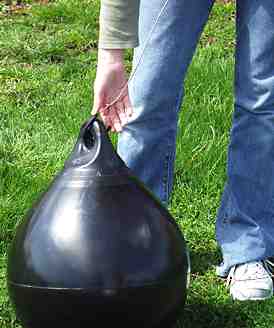
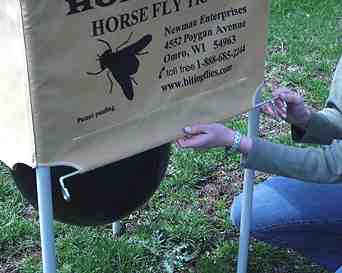
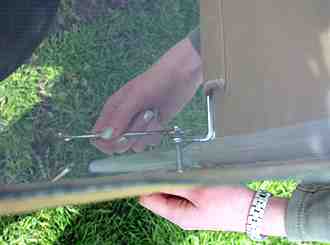
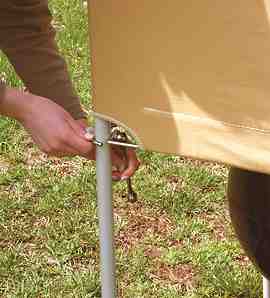
Hook the large end of the black tubing covered link wire into the eye of the target ball (Fig. left) and hook the other end of the link wire over the "W" hanger wire (Fig. right).
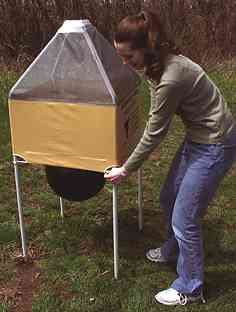
Place the fiberglass-screen-and-canvas tent cover over the legs and metal inner top, aligning the seams of the screen and corners of the tent with the legs.
Place a brace rod in each of the 4 lower "pockets" of the tent with one "eye" end of a brace rod in each corner.
Place the threaded portion of the brace rod through the "eye" of the adjacent brace rod so that a leg is "captured" between the two.
Using a 7/16 inch wrench, screw a self-locking nut, with a washer underneath, on each of the 4 brace rod threads, but do not tighten at this time.
Pull the tent down snugly and evenly, making sure the tent cut-outs for the rods are centered on each corner.
Now tighten the nuts enough to hold the tent down snugly.
Using the 4 screws, fasten the plastic outer top to the metal inner top.
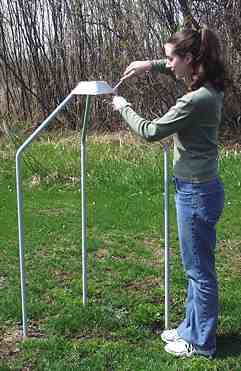
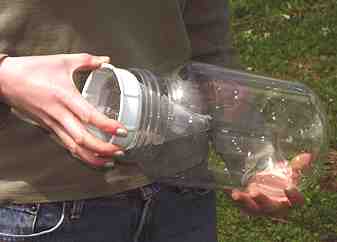
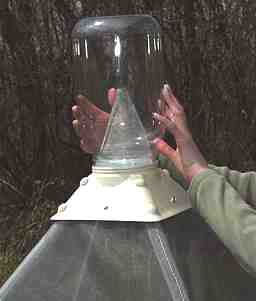
Place the cone screen in the container (Fig. left) and screw into the outer top (Fig. right).
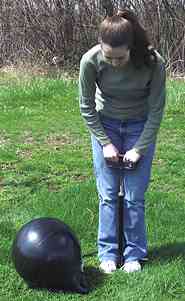
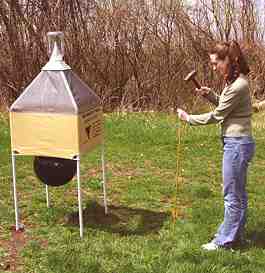
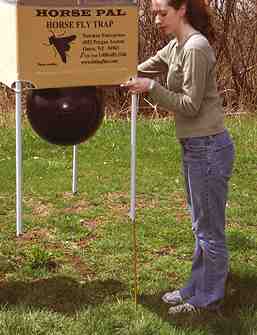
After selecting the location for the trap according to the trap-use instructions, drive the steel rod into the ground until the blade is below ground level.
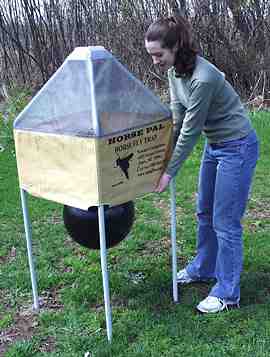
Lift the trap and place it over the steel rod so that the rod is inside one of the four legs when the trap is sitting on the ground. If used around livestock, make sure the trap is protected from physical damage by a "curious" animal.
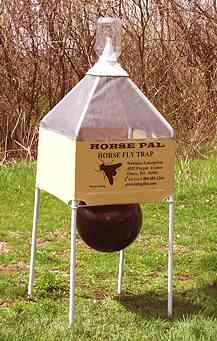
HORSE PAL® Site Set-Up
Select an area where a breeze will keep the ball in motion and the ball is clearly visible to flies for a long distance in all directions. Do not place trap next to a building or other visual obstacle that will "hide" the trap from a fly's sight.
Place the trap on level ground so that the ball will hang evenly between the legs of the trap.
Drive the steel rod in the ground until the blade is below ground level. Place one leg of the trap over the rod so that it is inside the leg to prevent the trap from blowing over in the wind.
If the trap is used to protect livestock and the animals tend to linger in a particular area, it is helpful to place the trap near that area. Select an area that is outside the stable or paddock, or otherwise fence in an area to protect the trap from physical damage from a curious animal.
If the trap is to be used in conjunction with a swimming pool, it may help to place the trap near the pool and move it further away when the pool is in use if the trap interferes with pool activity.
The trap seems more effective for horseflies if placed out in the open.Deerflies seem to "hunt" along the edge of woods or hedgerows and the trap may be more effective for deerflies in that location.
For reasons not understood, moving the trap just a few feet can sometimes dramatically change the effectiveness of the trap.
HORSE PAL® Use
DO NOT USE INSECTICIDES IN OR AROUND THE TRAP. The trapped flies will die in the container. Insecticides discourage flies from approaching the trap. If an insecticide is accidently used, thoroughly wash off the insecticide.
When flies fill the clear container not more than above about 1/2 of the screen cone, unscrew the clear container leaving the screen cone inside the container. Place a flat object over the top of the trap opening to retain the flies in the lower portion of the trap until the clear container is replaced. Fill the container with water to drown any remaining live flies, if necessary, before removing the screen cone to dispose of the trapped flies.
Life of the Horse Fly
There are many species of blood-feeding flies in the insect family Tabanidae. The Horse pal is designed to spe- cifically trap this family of biting flies. These flies are horse flies (Tabanus sp.), deer flies (Chrysops sp.) and the yellow fly (Diachlorus ferrugatus). These flies are also known by several different names such as green heads. By any name they are vicious, painful biters, making life miserable for horses, people, and other animals.
Horse fly bites are more than an annoyance. They can transmit disease, including Equine Infectious Anemia, Potomac Horse Fever, and possibly Lyme disease (New England Journal of Medicine 322: 17:52 1990).
The fly’s sharp mouthparts saw through the skin of the victim making a bleeding wound which allows the fly to suck blood for several minutes. Like the mosquito only the female bites to feed on blood.
Horse flies (deer flies are similar) deposit egg masses usually on vegetation over moist soil or near water where the larva burrow preferably into moist soil or the bottoms of ponds or streams. They will also burrow into dry soil. Larva feed on organic matter or insects, worms etc., maturing in late spring.
Depending on the species and location, the life cycle can range from two months to over two years.
Adult flies are extremely strong fliers and can travel long distances from their breeding sites. Flies can migrate into an area within minutes after it has been treated with insecticide, making chemical treatment futile.
Continual trapping of the female flies before they bite and reproduce is an effective way to reduce fly-bite stress and biting fly populations.
Every fly caught saves you or your animal from a painful bite and the danger of possible infection. Not only that, but the trapped fly will not be able to lay many eggs for the next season.
Newman Enterprises
934 Lake Ct.
Madison, WI 53715-2018